Painted Easter Egg Tutorial
I've had some interest in how I make our hanging hand-painted easter eggs, so I thought I'd put together a quick tutorial for you. This is something I learned how to do when I was growing up in Norway, and I think it's pretty traditional in all the Scandinavian countries. I remember always looking forward to painting eggs as part of our Easter celebration. As a grown up I like that this method allows you to use the eggs to cook with, but also to keep the painted eggs for future use. I just store ours in an old egg carton.
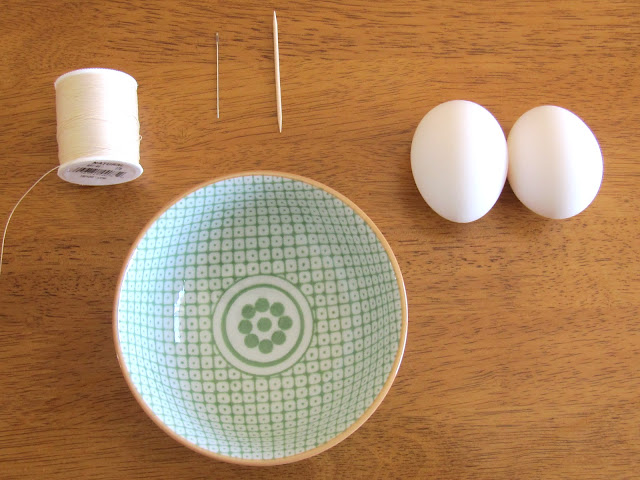
You will need:
- As many raw eggs as you want to paint.
- A bowl to blow the egg yolks into.
- A needle or pin for making holes.
- Thread for hanging the eggs.
- Toothpicks or matches for hanging.
- Paints or markers for decorating.
- Bonus points: an egg cup. This helps to hold the egg steady and limits the odds of plunging needles into your fingertips. You could also use a shot glass or an egg carton. I'll be using an eggcup, because I am taking my own pictures and don't have enough hands.
1. Find the top center of the raw egg, and push straight down with a needle or pin to make a hole. You will need to push quite hard, at the same time being careful to not break the egg.
2. Once you have a hole, use the needle to make it big enough to fit the toothpick through.
3. Flip the egg over and repeat on the bottom.
4. And now the tricky part: place your lips around the hole on the top side of the egg and blow until the egg yolk and whites come out of the hole in the bottom. Sore cheeks from blowing is just part of the charm! Make it easier on yourself by poking a hole in the membrane surrounding the egg and in the yolk with a toothpick. It helps to make the bottom hole slightly bigger than the top. You can also shake the egg a bit to move things along, but please don't flip the egg over and try blowing from the bottom. Salmonella from accidentally ingesting raw egg is not part of the charm. Refrigerate the raw eggs to cook with. Omelettes, anyone?
5. Tadah! You now have one empty egg shell with holes on the top and the bottom. Rinse it well with water (you can blow it out like you did with the yolk) and set the egg to dry. Bust out the hair dryer if you're feeling impatient, or just move on to the next egg.
6. Decorate your egg! I like to use water color paints, but markers work well too. I haven't tried myself, but these eggs would also be good for decoupaging. I recommend painting your egg in stages or layers, and letting the paint dry completely before moving on. Fortunately, water color wipes off very easily if you mess up.
7. Now that your egg is all painted and pretty, it's time to hang it! Cut the ends off your toothpick, and tie some thread around it in a loop, so it looks like the photo above. You could use ribbon instead of thread, but that requires a bigger hole in the top of the egg, so it's kind of a prettiness tradeoff.
8. Make sure that the hole on top is big enough to fit the toothpick and the knot. Feed the toothpick inside, being careful to not slide the thread off the pick. Once the tooth pick is completely inside the egg, pull on the looped thread and...
9. Tadah - your egg now hangs! You are done.
10. Repeat again and again!
In Norway it is traditional to bring in some cut branches to hang your decorated eggs on. Even if your trees don't have leaves yet, you can always bring some branches in and force them. In a place with winters like they have in Norway, you could see why they might want to bring some spring green inside. I always thought it looked so pretty and fresh. Here is mine:
I hope that made some sense! Please let me know if you have any questions, and if anyone decides to actually do this, I'd love to see some photos!


Wow, that's impressive! Looks lovely!
ReplyDeleteYou did good..
ReplyDeleteVi kan bare bruke uekte egg vi nå siden Dylan er så over allergisk mot de..
I am definitely going to be trying this. Thanks for the tutorial!
ReplyDeleteSo adorable! I love stuff like this ... granted ... love to buy stuff like this since I'm really not crafty at all ... but you know :)!
ReplyDeleteNow those really are pretty! I grinned when I saw you using the paints- I was a bit unsure if they would be relevant at the time!
ReplyDeleteOur easter is going to be a camp out in the living room, as the kitchen is in mayhem!
pp.s I just noticed! 48 followers- that's fantastic! Always knew you were brilliant!
Thank you so much for taking the time to do this! I love this idea. It brings back memories. My mother taught my sister and I how to blow eggs. We used to decorate them for Halloween. I painted one green, then painted a scary face and glued black yarn on for hair. I put a ring of thick yarn on the bottom so it would stand up. That was 40 years ago and I still have it!
ReplyDeleteI will try doing this with my kids when they wake up in the morning!
I love this Tamsin! I especially love the idea of bringing in fresh greenery.
ReplyDelete